Thursday, October 29, 2015

Wednesday, October 28, 2015
Devilish Devil Halloween Cupcakes!!!

What You Need:

-Devils Food Chocolate Cake Mix ( I grabbed the wrong box for the picture OOPS)
-Chocolate Frosting
- Vanilla or Cream Cheese Frosting which ever you prefer
-1 Cherry AirHeads Candy
-Black Food Coloring
-Red Food Coloring( I prefer wiltons red food coloring it makes a better red color)Buy HERE
-Wiltons Candy Bones Buy HERE
-Red Decorating Sugar
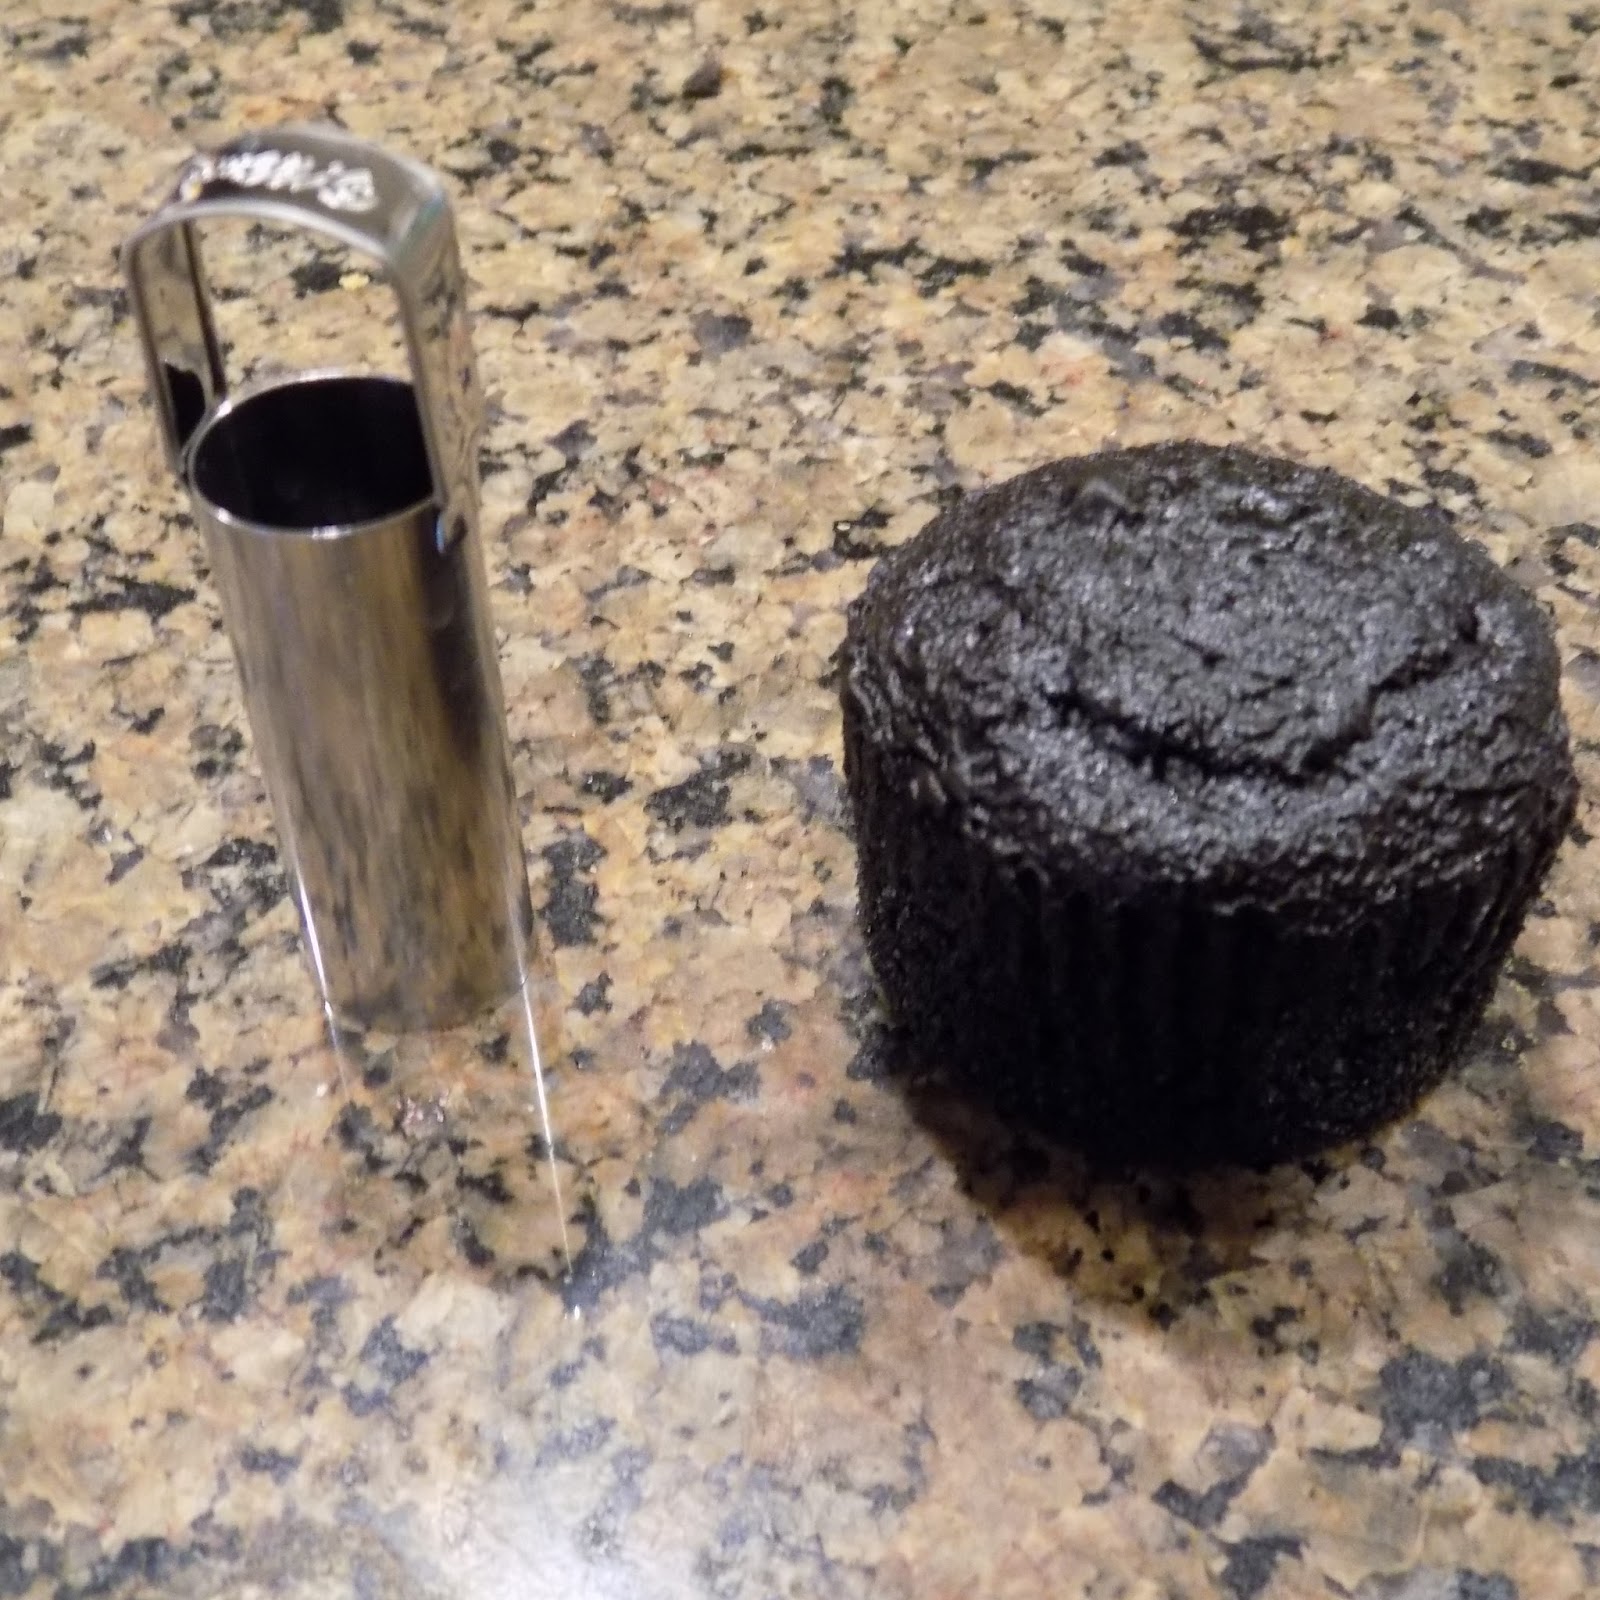
-Cupcake Corer Buy HERE
-2 Plastic ziplok baggy or 2 Decorating bags
- prefer decorating tips
-Rolling Pin
-Good Pair of Kitchen Shears
Ready! Set! Bake!!
Step 1:
Make your cupcakes and add black food coloring into the mix to turn you cupcakes black!
Then bake and let cool!

Step 2:
Take your cupcake corer and core your cupcake about half way through
Be careful not to go all the way through
Make sure to tap out any remaining crumbs left in the cupcake


Step 3:
Take some of your Wilton's candy bones and put them at the bottom of the hole in your cupcake


Step 4: Take you vanilla frosting and mix in your red food coloring

Step 5: Take your baggy or decorating bag put in a filling tip cut the corner out and fill the bag with your red frosting then fill the center of your cupcake
Tap your cupcake lightly on the bottom to remove any air bubbles, then continue to fill till you reach the top. Make sure the frosting is level with the top of the cupcake.

Step 5: Take the Airheads candy and roll it out with the rolling pin, you want it to be pretty thin, this makes it easier to work with and cut.

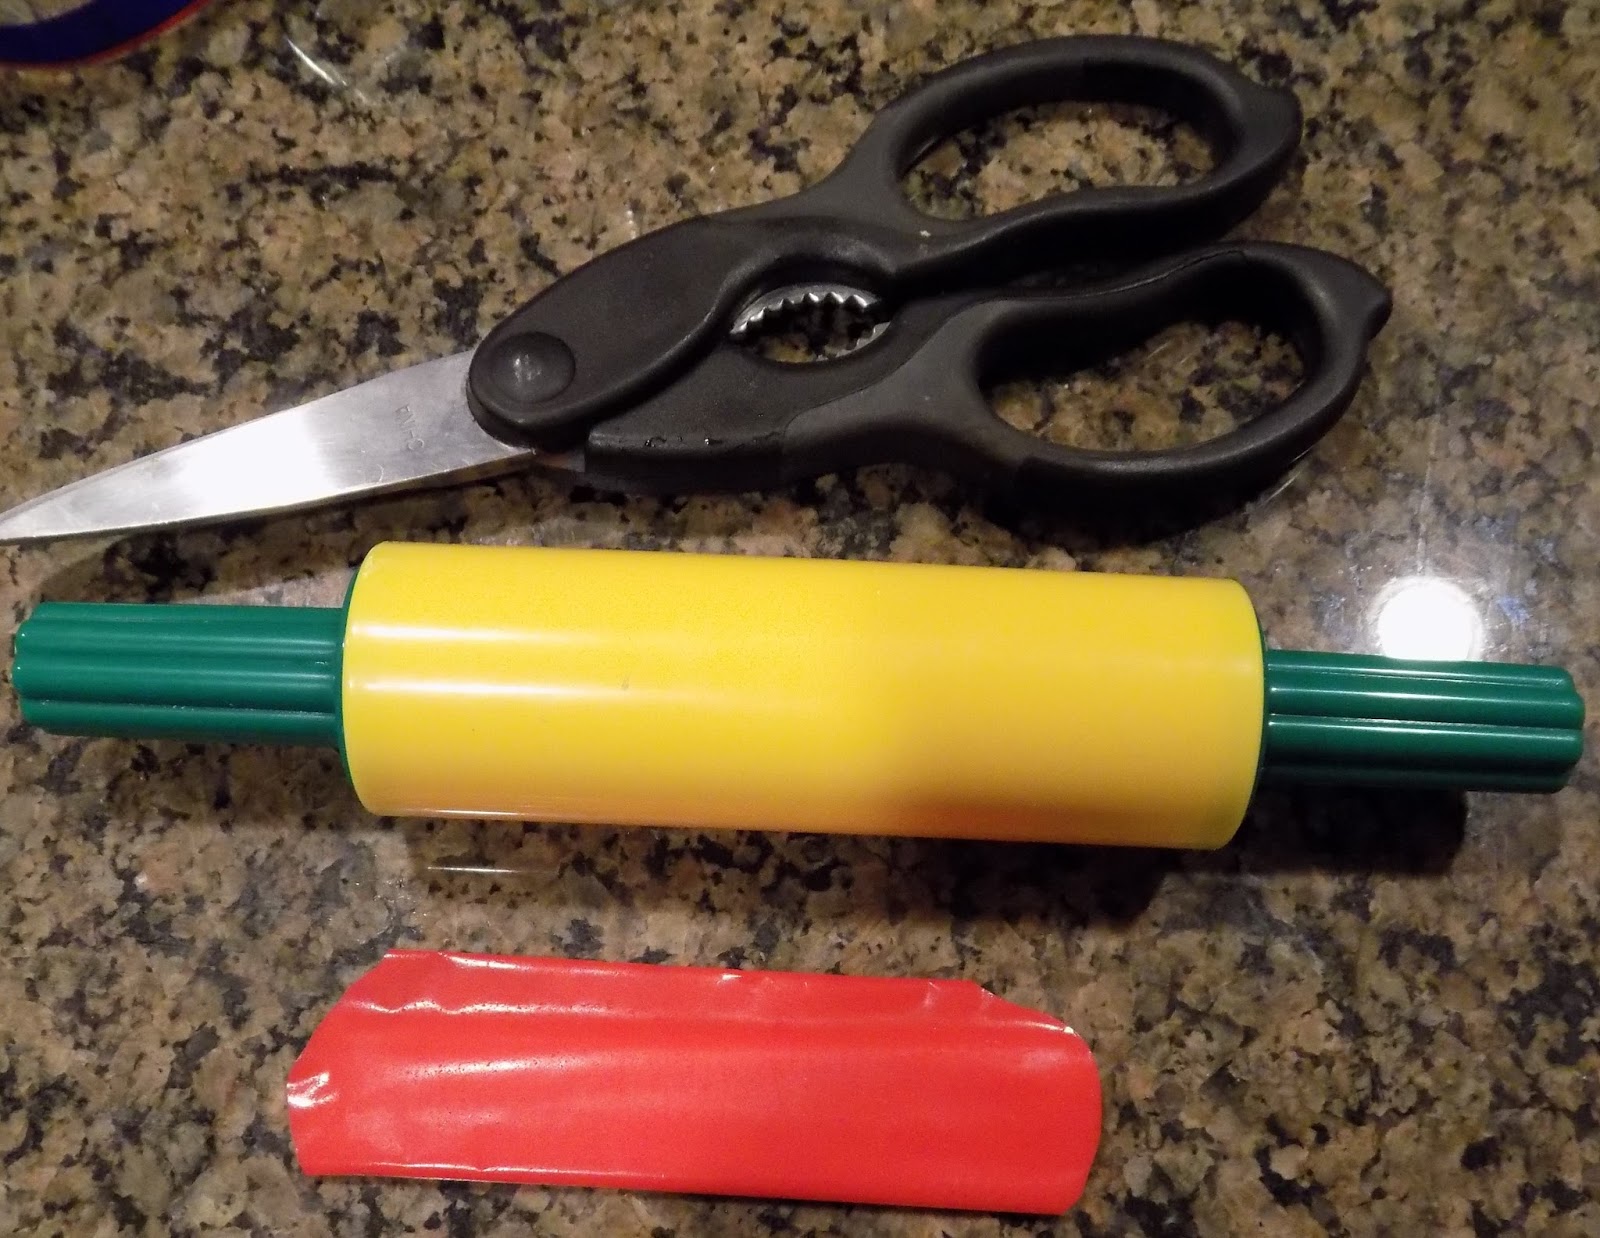

Step 6: Cut out you horns, small strip for the tail and triangle for the end of the tail.
One AirHeads candy can make about 10 sets

Step 7: Roll the tail strip to make it more round then push the triangle part onto the end of it, if it won't stick well use a bit of water to attach it. Volia! Your devil's tail is complete!

Step 8: Frost your cupcake with the desired tip ( add black food coloring to your chocolate frosting to make it black) My frosting was a bit too warm on this cupcake if you run into this problem refrigerate you frosting for a few minutes
Step 9: Add your Airheads' decorations as desired

Step 10: Add your red sugar to the top of your cupcake to add a little pizzazz !

Step 11: Eat and ENJOY!!!


Happy Baking & Happy Halloween!!
*Disclaimer: I did receive the Airheads candy free for testing and creating, but all opinions are my own.
#AirHeadsCrafts #Smiley360 #GotItFree
AirHeads Sorbet!! -How To!!- Halloween fun!

So, this is one of the easiest recipes I've ever created!! I created this with my dairy -free son in mind. This entire recipe contains no milk!
What you need:
-Your Favorite Sorbet, we used Haagen-Dazs Zesty Lemon because we love the flavor, it mixes well with Airheads and it's very clear so you can see all the awesome Airheads inside the sorbet!

-AirHeads Candy! The amount will vary based on how much sorbet you mix and how many peces you want in your sorbet. I used 4 Airheads for my sorbet AirHeads mix.

- Sharp knife or good pair of kitchen scissors (scissors are easy to use when working with AirHeads candy)
-Ice Cream scoop or good spoon ;)
Optional items for Halloween decorating:
-Wiltons Candy Eyeballs

-AirHeads Xtremes Rainbow Berry

-AirHeads Bites

Now your ready to create your masterpiece!!!
Step 1:
Cut up your Airheads in small confetti like strips

Step 2:
Throw them on your sorbet, now you could stop here and use the airheads as a topping like sprinkles if you like or you can move on to step 3

Step 3:
Mix the Airheads into the sorbet thoroughly

Step 4: You can either eat and enjoy at this point or put back in the freeze for 3-4 hours to harden back up

Step 5(optional): Halloween fun option! Let your kids decorate to their little hearts content!
here is our 3 eyed crazy mow-hawked monsters!


See Simple and really easy for you and your kids to enjoy!!
*Disclaimer: I did receive this Airheads candy free from Airheads and smiley360 to test review and create. All opinions are my own
Happy Creating!
#Halloween #AirHeadsCrafts #gotitfree
Monday, October 19, 2015
Annie's HomeGrown Organic Creamy Tomato & Bunny Pasta Soup Review

It was a dark and stormy night......
Ok, it wasn't stormy but it sure was dark and cold out(by southern California standards). I figured it would be the perfect time to try Annie's HomeGrown Organic Creamy Tomato & Bunny Pasta Soup(try saying that 10 times fast )
My son absolutely love tomato soup so it had that going for it, problem is is that he like one certain type of tomato soup. After a little coaxing, he finally said he would at least try it!! A victory within itself!!!
So I microwaved it up, put it in for 3 minutes
Direction say place in microwave for 2-4 minutes and cover loosely. So I figured 3 minutes was a happy medium.
The little bunnies came out looking and smelling delicious! It only there was smell-o-vision you you could smell this awesome smell.

The bunnies and carrots are soooo cute! I'm reminded of Finding Nemo when Dory was sing just keep swimming. swimming, swimming.. Just keep swimming little bunnies :D
My son did his normal thing, broke up a ton of cracker over the top of his soup. We usually use saltines but we were out so he used Club crackers this time.

Don't mind the cracker mess, breaking cracker for Annie's Creamy Tomato Soup is serious business!
Next he had to make sure it was cool enough ...

Then finally it was just right...

Then he just devoured it!!!!

I think he loves it!!!
Yep, it's a hit! Kid approved!!!

Thank you Annie's HomeGrown for allowing us t test and review this for free through Influenster!
If anyone would like to purchase Annie's HomeGrown soups or products they are sold at Target or you can purchase on Amazon.com links below!!
Annie's Homegrown Soup, Creamy Tomato and Bunny Pasta
Annie's Homegrown Soup, Star Pasta and Chicken
Annie's Homegrown Soup, Tomato
I also recommend these saltines to be added to you soup if you like
Annie's Homegrown Organic Bunny Classic Crackers Saltines
Thank you so much for reading!!
#choosegood #contest #justkeepswimming #influenster #annieshomegrown #review #gotitfree
Sunday, October 18, 2015
MINI APPLE PIES- HALLOWEEN EDITION!!


So let me just start by saying this is the first time I have ever made mini apple pie, much less in pumpkin form!! I seem to like making things difficult on myself haha.
Prep Time: 20-30 Cook Time: 15 min
Oven Temp: 425 degrees
makes 5 - 6 pies (depending on the size of your cookie cutters)
Ingredients:
-Pie Crust Dough


-Apple Pie Filling

-1/4 tsp of cinnamon
-yellow, red, green and blue food coloring

-5-8 tsp Sugar
-water
-cooking spray
-butter
-Sparkly cupcake gems for the ghost if you want that extra piazzas, you could just use regular sugar though

-Cookie cutters of your choosing( I found a huge box at Micheal's for 8.00!! It was 70% off picked it up on 10/18)

-Snack size ziploc baggies

Making The Pies:
start by
Pre-heating your oven to 425.
Then
Make the colored sugar:
For the orange sugar:
1 snack size zip lock bag( any size will work)
3 drops of yellow food coloring
2 drops of red food coloring
2 tsp of sugar
mix all together in the zip lock bag gently till color is mixed nicely. Then spread sugar out on a plate to dry. Allow to dry for 15-25 minutes
For Green:
4 drops of green
2 tsp of sugar
mix all together in zip lock bag till blended
spread sugar out on a plate allow to dry 15-25 minutes
For Black/grayish:
2 tsp of sugar
3 drops of blue
1 drop of red
1 drop or green
mix well in a ziploc bag and allow to dry for 15-25 minutes
NOTE: you can buy black food coloring if you want a really black color for the ghosts eyes or black cat

Making the Apple filling:
I just used the canned apple pie filling but you can make your own if you like :)
dump the can into a medium size mixing bowl

cut up the apples with a knife so they are small chunks ( this is really easy only took me a minute)
mix in your 1/4 tsp cinnamon
and BAM !!! Filling is ready!

Now for the fun part!!!
Roll out your pie dough and start cutting out your pumpkins and ghosts (or what ever Halloween shape you prefer) Just remember the more complex design that have smaller details are harder to make. Each needs a front and back. Set your back pieces on your pre greased baking pan. Spoon about 1/4 cup apple pie filling onto the center of each pie crust. This amount will vary based on the size and shape of you cookie cutters.
Set these aside.

With the remaining cutout start making your faces on pumpkins ans ghosts! Make sure to use a sharp knife it helps a lot.
Moisten the edges of the crust, then place the top piece on each. Next use a fork around all the edges to seal the pies.


Bake for 15 minutes or until lightly browned. Remove and allow to cool.
Then melt your butter (you don't need much)
then brush it onto the top of the pie crust and sprinkle your desired sugar color on
Voila!! Cute Mini Apple Pie just in time for Halloween!!

My toothy grinning pumpkin

My son's spooky ghost


Love my little vampire pumpkin!!

Here's the sugar free model, for those who can't eat too much sugar or artificial colors

Thanks for checking out my blog, let me know if you have any questions!


Kid tested and approved!!
Subscribe to:
Posts (Atom)